Moon Night – Photoshop Manipulation & Poster Design Tutorial
 |
| Moon Night – Photoshop Tutorial |
Hi Viewers, Today, I’ll show you a very nice and special Photoshop Manipulation technique. By this tutorial, you’ll learn how to correct color and balance light. Also you can learn how to cut background easily and blending on other background. Also you will get some very important idea about manipulation. So why late? Let’s start our mission.
[Note: I have done this work by utilizing Adobe Photoshop CC 2017. It might be work on Adobe Photoshop cs 6, cs 7, CC 2014, CC 2015 and CC 2017.]
STEP 1

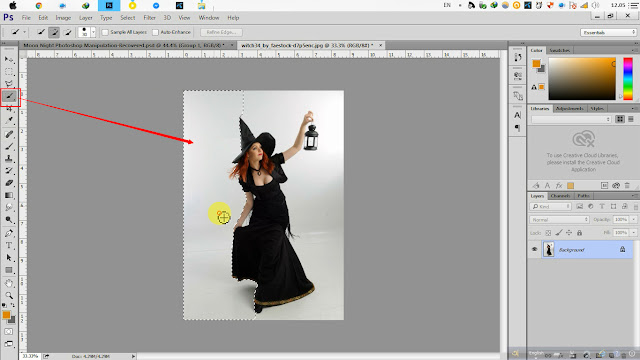
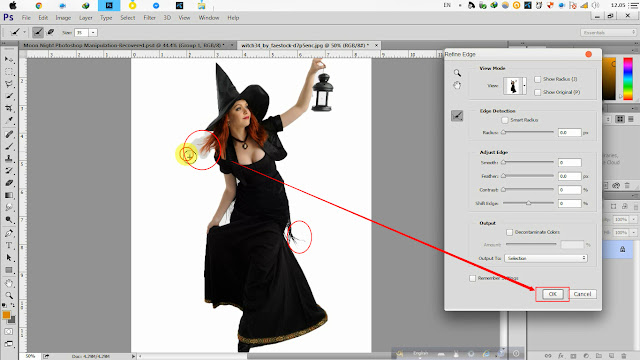
You will get a brush. Now rub the brush on the hairs of the girl. After that, hit on OK button. Look the Image below.
Now, Click the Add layer mask icon at the bottom of the Layers panel.
STEP 2
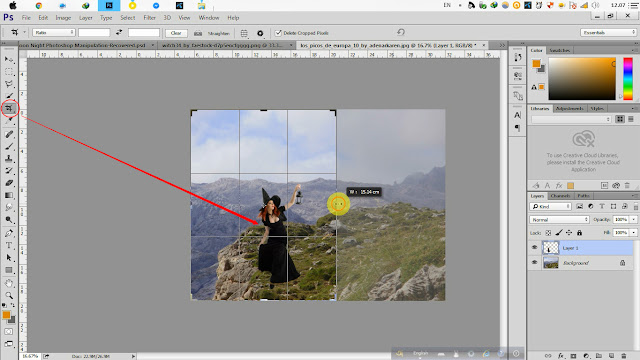
Import the Hill background in Photoshop. Also import the girl’s image in the same window of Photoshop. Pick the Crop Tool and get those area like the screenshot below.
STEP 3
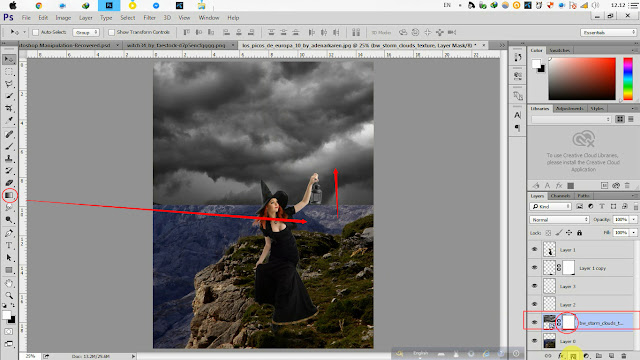
Now import the sky image under the layer of “Hill” layer. Click the Add layer mask icon at the bottom of the Layers panel by selecting the layer of “Sky” layer. At this moment, pick the Gradient Tool and hit under and drag middle of the Sky. And finally release it.
Go to Filter > Camera Raw Filter and set the temperature -21, Tint -13 and hit on OK.

STEP 4
Create a new layer under all layers in layer panel. And pic a grey color in ‘Color Picker’ and go to Edit > Fill > Foreground Color to fill that Gray color in Background.
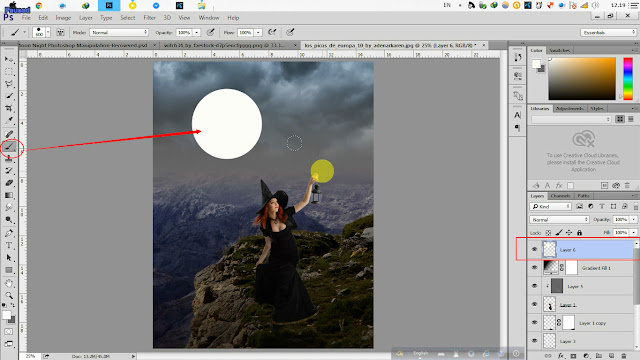
Okay, Now create a new layer above the layer of ‘Sky’. Get a white color and Pick the Brush Tool, which hardness is 0% and hit above the girls head. Follow screenshot below.
Duplicate this layer. (‘layer 6’ to ‘layer 6 copy’)
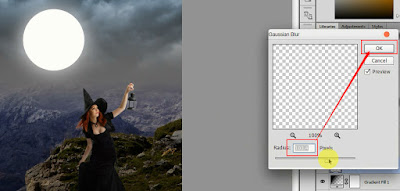
By selecting ‘layer 6’, go to Filter > Blur > Gaussian Blur.
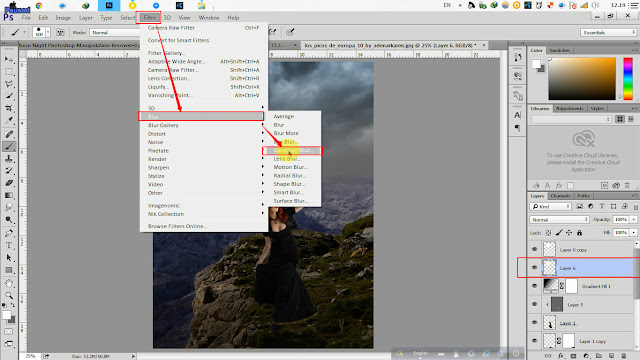
Set the radius 103.4 and hit OK. Follow screenshot below.
STEP 5
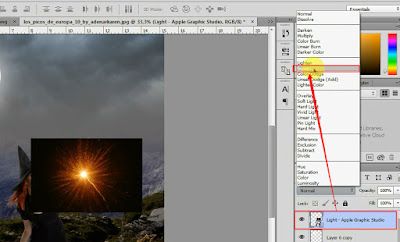
Import the ‘optical sun light’ image on the hurricane, and set it’s blending mood to screen. Go to Filter > Blur > Gaussian Blur and set the radius 50 and hit OK. We have already done the same work in step 3, to make the moon realistic.
STEP 6
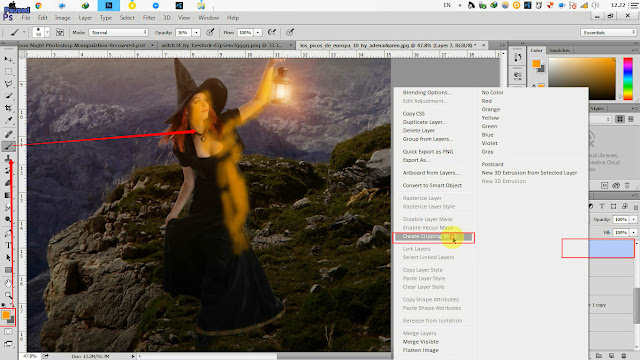
In this step, we’ll give a realistic Fire effect/ side effect of fire. Create a new layer above all layer. Also pic a Orange color in color picker. Now select ‘Brush Tool’ from left bar of Photoshop. Paint the brush on the women gently. Follow the image below.
Click right button on this layer and select ‘Create Clipping Mask’. At last, set it’s blending mood to screen.
STEP 7
Now create a new layer above all layer and go to Image > Apply Image to marge all layers into one.
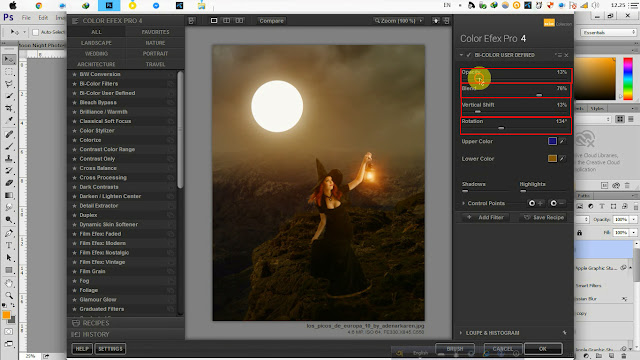
Go to Filter > Nik Collection and select your desired color effect and finally hit OK.
Note : Google Nik Collection is not a difficult plugin of Photoshop.
STEP 8
I hope you have enjoyed this tutorial. If you mean, you have not ability to understand Text Tutorials, no matter. We’ve also created a video tutorial for you. Check below. If any question for help or suggestion please comment below.

